
Crock-pot Yogurt
February 18, 2010 § 51 Comments
By popular demand… here’s a series of pictures on the making of homemade yogurt.
Now trust me on this one – I am a yogurt connoisseur. I grew up in Azerbaijan, where, when I was growing up, the only way to get plain yogurt was to either make it yourself or buy it homemade at a market. I then moved to Bulgaria, where you could buy it in a store, and yogurt was an important ingredient in a lot of dishes. Storebotten American supermarket yogurt is not yogurt as I know it. It’s not bad, but it’s not the same thing – most of the time it’s got pectin added to it for thickness, because, I read somewhere, the industry thought that, when people saw the whey separate from the solids (which will to some extent happen to the unadulterated yogurt after it sits there for a while), they’d decide that it was going bad. Just goes to show how removed people can be from the source of their food. For instance, did you know that fresh yogurt is sweet and mild? That kind of freshness and sweetness can only be had at home. All in all, I am so happy I am doing it myself! My baby can’t live without it. My 4-year-old loves it. I use yogurt in half of my cooking anyway as it is. It’s perfect.
Now to the mechanics of it – it’s easy, and it’s half the cost. All you ever need to buy is milk, using the remainder of your own previous batch of yogurt for inoculation. Yogurt makes yogurt. No fancy cultures need. It’s that simple. And your inner cheapskate is sure to appreciate the savings.
Let’s do the simple math:
2 qt of organic yogurt: $8.00 (roughly)
2 qt of organic homemade yogurt: $3.50 (the cost of a half a gallon of organic milk)
How much more persuasion do you need?
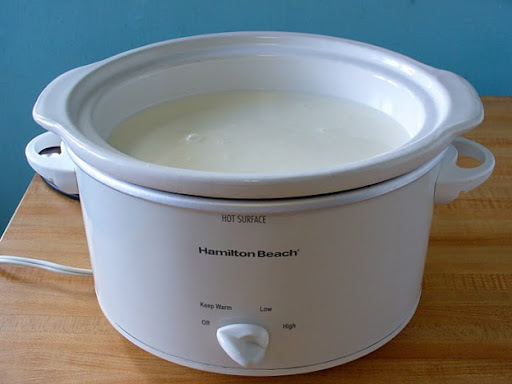
Now for the equipment, I make mine in a crock-pot. One day I decided that God made crock-pots especially for making yogurt (that ceramic inset is designed to keep warm for a long time after you turn it off), went online, googled “crock-pot yogurt,” and landed on this website which gave me most of the information I needed (thank you, the author of “A Year of Slow Cooking”). I think they even tell you how to make various flavored kinds. I do two things differently – I am serious about measuring the temperatures rather than just timing it, and I place my crock-pot inset into the oven with a light on to keep it warm overnight rather than wrapping it in a towel, since I found that to be more reliable.
Now let’s see how it’s done:
Note: Some recipes will recommend that you sterilize your equipment. That’s a bunch of baloney. Don’t bother, it makes no difference whatsoever.

This is a 2 qt crock-pot. But I don’t see why you couldn’t use a larger one. Just pour your milk in. I use organic whole milk. I find that it works the best with fresh milk, not the milk that is a week old and is starting to turn sour.
Cover, and turn the dial to low. Allow to heat for about 2 1/2 hours, or until the temperature reaches 180 to 190 degrees. This is done to create a sterile medium to be inoculated with your yogurt. The die-hard raw food enthusiasts, however, will tell you to use raw milk and skip this step, merely heating it to 110, which is the temperature you want your yogurt to be when you inoculate it.

Next, I really recommend that you get yourself one of these – this is a digital thermometer with a timer and an alarm and high heat tolerance – I use it for everything from making candy to deep frying to cooking meat and poultry. And, of course, for making yogurt. I couldn’t live without one, and if you want a fail-proof thick, luscious yogurt like mine, you will be much aided if you have one of those. It uses batteries. You are not opposed to using batteries, right? Just making sure.

About 2 1/2 hrs later I check the temperature, and see that it is at 181 degrees. Perfect! Unplug your crock-pot at this point and let it cool for about three hours, or until it cools down to 110-111 degrees. This is the single most important number you need to remember – go hotter, and you’ll end up with a thinner yogurt, or at least I did. Some recipes will tell you that up to 120 degrees is fine, but that too is a bunch of baloney. It’s not fine. 110 yielded the best results for me.

Once my milk has cooled down to 110 degrees, I like to skim of all of the film from the top. I find that it doesn’t do anything for my yogurt – just interferes with the quality of it setting properly. At least that’s my experience.

See, I am skimming it off.

There’s still some left, so I am going to skim that off as well.

And now it looks like this. A few tiny puddles of fat on the surface are fine – just not the dry skin.

Remove about a cup of warm milk into a separate cup.

Add to it 2 T of plain yogurt (you are going to have to buy some to begin with, but as long as you never stop making yogurt, as I haven’t stopped ever since I began making my own this past summer, you’ll never need to buy any more, always using a bit of your own old batch). Take care to mix it in well with a whisk.
Alternatively, you CAN add yogurt/starter directly to the milk in the crock-pot, but be sure that your milk is still at 117-115 degrees, not 110-111, because the yogurt added directly to the pot will bring the temperature down by about 5 degrees. If you do that with a 110-degree yogurt, it may not set.
Note of caution: Resist the temptation to add more culture (old yogurt) to your milk. More culture will not lead to thicker yogurt, but, in fact, do the opposite. Yogurt is made of living bacteria which do best multiplying if allowed adequate lebensraum (or “living space” in German), to quote Irma Rombauer – the author of The Joy of Cooking.

Pour your milk-yogurt mixture back into the crock-pot and once again mix it in thoroughly with a whisk, which will make it easier for the culture to colonize the milk.

Now turn on the light in your oven (but leave the oven off), and place your crock-pot inset in it, covering it with a towel and closing the door. Don’t worry, the towel won’t on catch fire. Leave overnight. (Technically, yogurt needs 4 hours, but I find that 8 or more works MUCH better).

Fast-forward to the next day. Running to the oven the following morning to see if your yogurt turned out is so exciting – it’s very much like looking inside your stocking on Christmas morning (the experience of joy and anticipation I can only compare to heading out chicken butchering or deer hunting).
And sure enough, it did!
Sometimes a bit of whey pools up at the top – I just go ahead and pour it off carefully by tilting the crock-pot inset. I don’t try to strain it.

Do you see how incredibly thick this is? Notice the indentation left behind by the spoon. Be sure to give some to your kids at this point – the sweetness of the fresh yogurt, as I said above, is like nothing else.
I then transfer my yogurt into a half-gallon jar, using a large spoon/ladle and a canning funnel to minimize the mess, and keep it in the fridge. Two things will happen to your yogurt in the fridge – it will thicken further and will continue to develop a more and more sour flavor.
What to do if your yogurt fails: Sometimes, however, the yogurt doesn’t set and comes out way too thin if it wasn’t warm enough or for some other mysterious reasons I might not be aware of (it happened to me the total of two times in the course of making it weekly for eight months, including today). Do not despair, curse me, or throw it away! It is now a perfect base for making homemade ricotta! Ricotta, you see, is nothing but milk that has been heated to the scalding point and to which acid has been added in the form of either buttermilk, lemon juice, or vinegar to cause the whey to separate from the curd. The curd part is then drained of most of the whey through a cheese cloth. This is exactly what I did this morning, and already my kids have eaten it almost “all gone.” Here’s what it looked like:
 Not the one to despair, I stuck my crock-pot’s inset back into its base, and turned the dial to high. In about twenty minutes, this happened. Note how the big lump of white curd is visibly separating from the translucent whey.
 I then set a colander over a bowl,
 lined it with this lavender kitchen towel because I didn’t have any cheese cloth,
 dumped the entire contents of my crock-pot in there, left it on the kitchen counter,
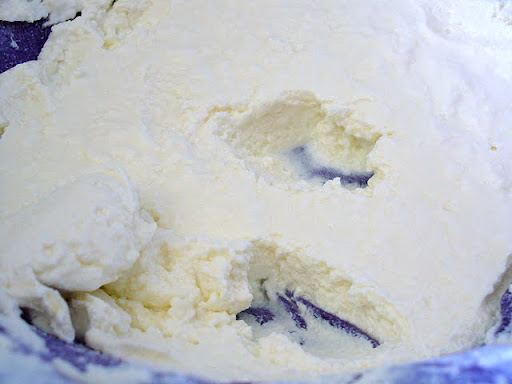 and, a couple of hours later, ricotta happened. You may choose to drain it more or less, depending on your idea of ricotta.
 See? As Jacob’s dad says, problems are opportunities!
Possible uses: Yogurt is not only for granola! Consider using it in one of the following recipes from my typically Mid-East-flavored Midwestern farm kitchen:
Dovga: Azerbaijani Yogurt Cream Soup
Oladyi: Russian Yogurt Pancakes
Or, try this other yogurt soup recipe from my fellow (though considerably more distinguished) Azerbaijani-American blogger:
Crock-Pot Yogurt
(Adapted from A Year of Slow Cooking Blog)
Note: This recipe is for a TWO-QUART crock-pot. A larger crock-pot might or might not behave differently.
Equipment needed:
- A crock-pot
- A digital (preferably) thermometer
Ingredients
- 2 qt fresh whole milk
- 2 T organic plain yogurt (you don’t have to have organic, though, I don’t think, I am just a snob that way)
Pour your milk into a crock-pot. Cover, and turn the dial to low. Heat for 2 1/2 hours or until the temperature has reached 180-190 degrees F. Turn off the heat and unplug your crock-pot. Let cool in its base for about 3 hours, or until the temperature cools down to 110-111 degrees. Skim off the dry film from the top. Remove a cup of warm milk into a separate container, and mix in the yogurt with a whisk. Take care to stir thoroughly. Return the milk/yogurt mixture to the crock-pot and stir thoroughly once again.
Replace the cover, remove the ceramic inset from its base, and place it in the oven with a light on (but the oven should be off), and leave overnight. Marvel at the wonderful flavor and thickness of the finished product. Now praise me.
If, for some reason, your yogurt doesn’t set (usually because it wasn’t warm enough, in my experience), do not throw it away but use it to make ricotta: place the crock-pot’s inset back into the base, cover with a lid, turn the heat to “high,” and heat until the curd starts to visibly separate from the whey. Transfer to a colander lined with cheese cloth or a clean kitchen towel, and set the colander over a bowl or sink to drain out the whey. Drain for several hours until the cheese has reached the desired consistency. You might find that the yogurt ricotta is a bit more tangy than the storebotten variety, but in a good way. I usually discard the whey, but Sally Fallon swears by it on the account of its health benefits, and suggests several uses for it in her book The Nourishing Traditions (the same book that will tell you why butter and animal fats are actually really healthy for you).
Alternatively, you can let your ricotta sit there till the evening to firm up (it tends to do that as it stiffens in the fridge), and add a small amount of table salt to taste, mixing it in. You now have something called shor – an Azeri (short of Azerbaijani) word for a variety of salted soft cheese, which I do believe was yogurt cheese. Traditionally they also added the nigella seed to it. This is especially wonderful spread on a tortilla and wrapped up in a tube or on the paper-thin Middle-Eastern bread called lavash (it’s easy to make on a griddle or a skillet, there’s nothing to it – I’ll show you sometime). In fact, the shor/lavash combo, both of which we bought homemade at farmer’s markets, were often my lunch for most of my childhood. I can also see this spread on canapes or crackers, perhaps topped with something, as an appetizer.
