
Crock-pot Yogurt
February 18, 2010 § 51 Comments
By popular demand… here’s a series of pictures on the making of homemade yogurt.
Now trust me on this one – I am a yogurt connoisseur. I grew up in Azerbaijan, where, when I was growing up, the only way to get plain yogurt was to either make it yourself or buy it homemade at a market. I then moved to Bulgaria, where you could buy it in a store, and yogurt was an important ingredient in a lot of dishes. Storebotten American supermarket yogurt is not yogurt as I know it. It’s not bad, but it’s not the same thing – most of the time it’s got pectin added to it for thickness, because, I read somewhere, the industry thought that, when people saw the whey separate from the solids (which will to some extent happen to the unadulterated yogurt after it sits there for a while), they’d decide that it was going bad. Just goes to show how removed people can be from the source of their food. For instance, did you know that fresh yogurt is sweet and mild? That kind of freshness and sweetness can only be had at home. All in all, I am so happy I am doing it myself! My baby can’t live without it. My 4-year-old loves it. I use yogurt in half of my cooking anyway as it is. It’s perfect.
Now to the mechanics of it – it’s easy, and it’s half the cost. All you ever need to buy is milk, using the remainder of your own previous batch of yogurt for inoculation. Yogurt makes yogurt. No fancy cultures need. It’s that simple. And your inner cheapskate is sure to appreciate the savings.
Let’s do the simple math:
2 qt of organic yogurt: $8.00 (roughly)
2 qt of organic homemade yogurt: $3.50 (the cost of a half a gallon of organic milk)
How much more persuasion do you need?
Now for the equipment, I make mine in a crock-pot. One day I decided that God made crock-pots especially for making yogurt (that ceramic inset is designed to keep warm for a long time after you turn it off), went online, googled “crock-pot yogurt,” and landed on this website which gave me most of the information I needed (thank you, the author of “A Year of Slow Cooking”). I think they even tell you how to make various flavored kinds. I do two things differently – I am serious about measuring the temperatures rather than just timing it, and I place my crock-pot inset into the oven with a light on to keep it warm overnight rather than wrapping it in a towel, since I found that to be more reliable.
Now let’s see how it’s done:
Note: Some recipes will recommend that you sterilize your equipment. That’s a bunch of baloney. Don’t bother, it makes no difference whatsoever.

This is a 2 qt crock-pot. But I don’t see why you couldn’t use a larger one. Just pour your milk in. I use organic whole milk. I find that it works the best with fresh milk, not the milk that is a week old and is starting to turn sour.
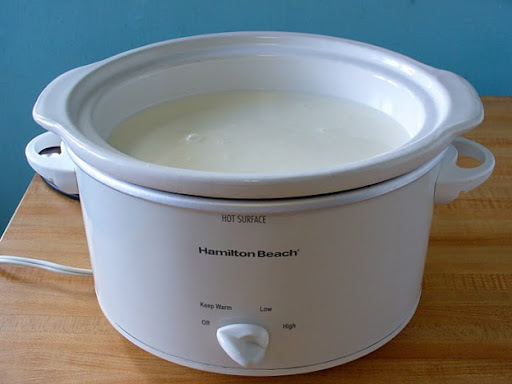
Cover, and turn the dial to low. Allow to heat for about 2 1/2 hours, or until the temperature reaches 180 to 190 degrees. This is done to create a sterile medium to be inoculated with your yogurt. The die-hard raw food enthusiasts, however, will tell you to use raw milk and skip this step, merely heating it to 110, which is the temperature you want your yogurt to be when you inoculate it.

Next, I really recommend that you get yourself one of these – this is a digital thermometer with a timer and an alarm and high heat tolerance – I use it for everything from making candy to deep frying to cooking meat and poultry. And, of course, for making yogurt. I couldn’t live without one, and if you want a fail-proof thick, luscious yogurt like mine, you will be much aided if you have one of those. It uses batteries. You are not opposed to using batteries, right? Just making sure.

About 2 1/2 hrs later I check the temperature, and see that it is at 181 degrees. Perfect! Unplug your crock-pot at this point and let it cool for about three hours, or until it cools down to 110-111 degrees. This is the single most important number you need to remember – go hotter, and you’ll end up with a thinner yogurt, or at least I did. Some recipes will tell you that up to 120 degrees is fine, but that too is a bunch of baloney. It’s not fine. 110 yielded the best results for me.

Once my milk has cooled down to 110 degrees, I like to skim of all of the film from the top. I find that it doesn’t do anything for my yogurt – just interferes with the quality of it setting properly. At least that’s my experience.

See, I am skimming it off.

There’s still some left, so I am going to skim that off as well.

And now it looks like this. A few tiny puddles of fat on the surface are fine – just not the dry skin.

Remove about a cup of warm milk into a separate cup.

Add to it 2 T of plain yogurt (you are going to have to buy some to begin with, but as long as you never stop making yogurt, as I haven’t stopped ever since I began making my own this past summer, you’ll never need to buy any more, always using a bit of your own old batch). Take care to mix it in well with a whisk.
Alternatively, you CAN add yogurt/starter directly to the milk in the crock-pot, but be sure that your milk is still at 117-115 degrees, not 110-111, because the yogurt added directly to the pot will bring the temperature down by about 5 degrees. If you do that with a 110-degree yogurt, it may not set.
Note of caution: Resist the temptation to add more culture (old yogurt) to your milk. More culture will not lead to thicker yogurt, but, in fact, do the opposite. Yogurt is made of living bacteria which do best multiplying if allowed adequate lebensraum (or “living space” in German), to quote Irma Rombauer – the author of The Joy of Cooking.

Pour your milk-yogurt mixture back into the crock-pot and once again mix it in thoroughly with a whisk, which will make it easier for the culture to colonize the milk.

Now turn on the light in your oven (but leave the oven off), and place your crock-pot inset in it, covering it with a towel and closing the door. Don’t worry, the towel won’t on catch fire. Leave overnight. (Technically, yogurt needs 4 hours, but I find that 8 or more works MUCH better).

Fast-forward to the next day. Running to the oven the following morning to see if your yogurt turned out is so exciting – it’s very much like looking inside your stocking on Christmas morning (the experience of joy and anticipation I can only compare to heading out chicken butchering or deer hunting).
And sure enough, it did!
Sometimes a bit of whey pools up at the top – I just go ahead and pour it off carefully by tilting the crock-pot inset. I don’t try to strain it.

Do you see how incredibly thick this is? Notice the indentation left behind by the spoon. Be sure to give some to your kids at this point – the sweetness of the fresh yogurt, as I said above, is like nothing else.
I then transfer my yogurt into a half-gallon jar, using a large spoon/ladle and a canning funnel to minimize the mess, and keep it in the fridge. Two things will happen to your yogurt in the fridge – it will thicken further and will continue to develop a more and more sour flavor.
What to do if your yogurt fails: Sometimes, however, the yogurt doesn’t set and comes out way too thin if it wasn’t warm enough or for some other mysterious reasons I might not be aware of (it happened to me the total of two times in the course of making it weekly for eight months, including today). Do not despair, curse me, or throw it away! It is now a perfect base for making homemade ricotta! Ricotta, you see, is nothing but milk that has been heated to the scalding point and to which acid has been added in the form of either buttermilk, lemon juice, or vinegar to cause the whey to separate from the curd. The curd part is then drained of most of the whey through a cheese cloth. This is exactly what I did this morning, and already my kids have eaten it almost “all gone.” Here’s what it looked like:
 Not the one to despair, I stuck my crock-pot’s inset back into its base, and turned the dial to high. In about twenty minutes, this happened. Note how the big lump of white curd is visibly separating from the translucent whey.
 I then set a colander over a bowl,
 lined it with this lavender kitchen towel because I didn’t have any cheese cloth,
 dumped the entire contents of my crock-pot in there, left it on the kitchen counter,
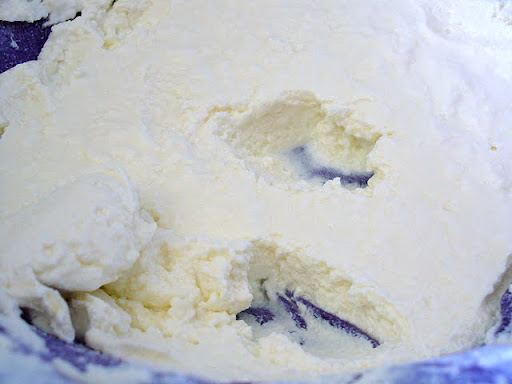 and, a couple of hours later, ricotta happened. You may choose to drain it more or less, depending on your idea of ricotta.
 See? As Jacob’s dad says, problems are opportunities!
Possible uses: Yogurt is not only for granola! Consider using it in one of the following recipes from my typically Mid-East-flavored Midwestern farm kitchen:
Dovga: Azerbaijani Yogurt Cream Soup
Oladyi: Russian Yogurt Pancakes
Or, try this other yogurt soup recipe from my fellow (though considerably more distinguished) Azerbaijani-American blogger:
Crock-Pot Yogurt
(Adapted from A Year of Slow Cooking Blog)
Note: This recipe is for a TWO-QUART crock-pot. A larger crock-pot might or might not behave differently.
Equipment needed:
- A crock-pot
- A digital (preferably) thermometer
Ingredients
- 2 qt fresh whole milk
- 2 T organic plain yogurt (you don’t have to have organic, though, I don’t think, I am just a snob that way)
Pour your milk into a crock-pot. Cover, and turn the dial to low. Heat for 2 1/2 hours or until the temperature has reached 180-190 degrees F. Turn off the heat and unplug your crock-pot. Let cool in its base for about 3 hours, or until the temperature cools down to 110-111 degrees. Skim off the dry film from the top. Remove a cup of warm milk into a separate container, and mix in the yogurt with a whisk. Take care to stir thoroughly. Return the milk/yogurt mixture to the crock-pot and stir thoroughly once again.
Replace the cover, remove the ceramic inset from its base, and place it in the oven with a light on (but the oven should be off), and leave overnight. Marvel at the wonderful flavor and thickness of the finished product. Now praise me.
If, for some reason, your yogurt doesn’t set (usually because it wasn’t warm enough, in my experience), do not throw it away but use it to make ricotta: place the crock-pot’s inset back into the base, cover with a lid, turn the heat to “high,” and heat until the curd starts to visibly separate from the whey. Transfer to a colander lined with cheese cloth or a clean kitchen towel, and set the colander over a bowl or sink to drain out the whey. Drain for several hours until the cheese has reached the desired consistency. You might find that the yogurt ricotta is a bit more tangy than the storebotten variety, but in a good way. I usually discard the whey, but Sally Fallon swears by it on the account of its health benefits, and suggests several uses for it in her book The Nourishing Traditions (the same book that will tell you why butter and animal fats are actually really healthy for you).
Alternatively, you can let your ricotta sit there till the evening to firm up (it tends to do that as it stiffens in the fridge), and add a small amount of table salt to taste, mixing it in. You now have something called shor – an Azeri (short of Azerbaijani) word for a variety of salted soft cheese, which I do believe was yogurt cheese. Traditionally they also added the nigella seed to it. This is especially wonderful spread on a tortilla and wrapped up in a tube or on the paper-thin Middle-Eastern bread called lavash (it’s easy to make on a griddle or a skillet, there’s nothing to it – I’ll show you sometime). In fact, the shor/lavash combo, both of which we bought homemade at farmer’s markets, were often my lunch for most of my childhood. I can also see this spread on canapes or crackers, perhaps topped with something, as an appetizer.

Would you get the same thick, lucious results using an organic 2% or skim milk?
Thanks!
Can this be made with a 2% or skim milk? Would love to try it but we do lowfat milk and yogurt, usually. I am missing the wonderful yogurt I had while living in Germany. The stuff in the US is to sweet … texture is wrong… Something is wrong 🙂
Thanks
Well I never tried it with anything else! But nothing stops you from trying. I’d be surprised if the 2 % didn’t work at least. I mean I do skim off a considerable amount of fat from the top just by removing the skin (the cream/fat flowing to the top).
Michelle, to answer your question, I tried perusing other blogs briefly, and here’s what I found:
Looks like skim milk might not be a good idea. But do try the 2 percent.
Always wanted to try to home-make yogurt, thank for the encouragement.
Two questions though:
How long does it keep in the fridge?
Can croc-pot be substituted by low-temp oven or even stove at the first step?
Thanks.
It keeps for about a week and a half I think? Some was there for two weeks and even then was still fine. As far as my experience in concerned.
My experience with the stove top – I did it once in a stainless steel pot (6qt? 5 qt?) because I wanted a gallon of yogurt instead of a half that particular time. It did work, was nice and thick. I tried that same thing again with half a gallon the following time, and it didn’t work at all – it didn’t really set, though I blame that on not measuring the temp that particular time. I would say use a heavy pot and definitely try it.
I would say don’t do the low-temp oven for heating the milk in the first step – the point is not to heat it slow, just to heat it to the scalding point. Crock-pot is good not because it is slow but because it has a ceramic inset that is designed to stay warm for a long time.
Other people would just heat milk in any pot until that scalding point, then pour into a jar, inoculate (even just a quart at a time), and then wrap it in towels and let it sit on a counter. My house however is heated with wood in winter and the nights are always cold here in Wisconsin in summer, both of which result in unsteady temperature in the house at night, so I feel like I need the assurance of the oven light to maintain a steady temp.
My friend makes hers in a thermos. Hers is also perfect.
If I were you I would do this (to reprise):
1)heat the milk over low heat until 180 degrees.
2)let cool to 110
3)remove 1 cup and mix into that 1 cup 1 T of yogurt
4)add back to the pot
5)cover the pot and place in the oven with the light on overnight
I’ve been thinking about buying a crock-pot, and this would be a very good reason to own one! I’ve avoided buying an expensive ‘yogurt maker’ because they make such small containers. We eat way too much yogurt to use one of those!
That was my thinking exactly.
We were gifted a yogurt maker a few years ago and it sat for a good while before we dusted it off and put it to use. It worked, more or less, but it seemed fussy and we abandoned it. Now that we’re trying to eliminate plastic waste, we’re back to making our own yogurt and kefir. Our oven seems to be at a perfect temperature for yogurt making (so long as we leave it in the off position). The crock-pot method looks worth a try. Your pictures suggest the yogurt is very thick, which I love!
Cheers,
Steve & Jason
http://yourfoodchoices.wordpress.com
And plus it’s an entirely different food item in my opinion.
Hi Sofya,
I just found your blog and absolutely love it. This post intrigued me since I’ve been wanting to make yogurt but was always intimidated by it. I do have a couple of questions though.
1. What does the light bulb being on add to the yogurt making process?
2. Is any yogurt good enough to mix in?
Thanks,
Anna
Hi Anna,
Thank you for your kind words, and I am glad you stopped by! To answer your questions:
1)I believe the light bulb makes the oven ever-so-slightly warm – just warm enough for the yogurt to incubate. Often, when you are baking bread, they (well meaning, experienced home bread bakers) will tell you to stick your dough in the oven with the light on – the same thing essentially.
2) Yes, any yogurt should be good enough from what I read – even if it has pectin, etc, because the concentration of those additives will be so small in the final product that it will make very little difference. That’s the theory. Myself, I have only tried one kind of yogurt – the organic seven star yogurt. But I would absolutely go ahead and try whatever is available. Definitely doesn’t need to be organic or anything.
Sophia
I have been hearing rave reviews about your blog and today had my first look. How delightful!
Lovely photos ,witty comments and detailed directions.
I intend to be a regular visitor. ( to home and website)
Grandpa Vincentio
Well welcome Vince! Now you will be tempted to come for supper more often!
Love the luscious creamy thick yogurt pictures! Please post or point out where to find good recipes for using the yogurt. I want to try it, but only know about eating yogurt with fruit and cereal like we Americans do.
Thanks,
Pat
Hi Pat,
Consider these:
Also, add to chicken salad dressing in addition to mustard and mayo so it’s not all mayo.
I make this garlic-yogurt sauce that I use for many things:
2 C yogurt + 1-2 cloves of PRESSED (not minced) garlic – you want all the juice out of it.
I use it on top of these sometimes,
also on top of dolma (not on this blog), but you can google it, and I also use it as a condiment for the following: pita bread stuffed with Russian fried potatoes, strips of grilled steak or hamburgers, and sliced tomatoes, cucumbers, and pickles, all topped with the yogurt-garlic sauce.
I have only ever heard of leaving the oven light on if you have a gas stove. The pilot light keeps the oven temp around 90 degrees, which is perfect for rising bread or making yogurt. I have an electric stove with an incadescent lightbulb in it, which doesn’t give off that kind of heat. I’m wondering if the warm crockpot insert has more to do with the consistant heat than the oven light does.
I have 2 ovens (read as: I love to bake). One is a small convection oven that we use partly in place of a microwave. It is able to be set below 150 degrees, and I am able to monitor the temp easily.
I really like the crockpot idea! My crockpot insert isn’t removable though, so I think I’ll try warming up my ceramic “sauerkraut” crock and making the yogurt in that!
I mean you don’t have to remove it from the base (the inset) – you could just wrap the whole thing in a blanket?
To me, the oven light makes a difference I think. Maybe it’s psychological! My particular light has worked well, it seems – I also used to do the same thing for bread dough. I have a gas oven without a pilot (electronic ignition) with an incandescent bulb. Before, I had an electric range with the same kind of light bulb, and it worked in the exact same way, although at the time I wasn’t making any yogurt, but I was baking bread a lot.
But here – yogurt is not exactly science – as long as you find one way or another to keep it warm at a certain temp for the four hours it needs to set.
My BFF Ann keeps hers in a thermos.
Hi again Jillian!
As fate would have it, I had a batch of yogurt incubating overnight – and I went and checked specifically, and the light did seem to emit pleasant heat and the inside of my oven was nicely warm-ish. Compare that with the 60 degrees in the house (in the morning the house is always 50 to 60 because we heat exclusively with a wood stove and it’s a large house).
Again, another perfect batch.
Well, that is cool to know! I consider myself pretty good bread baker, but I never would have tried this. Thanks:)
Hi Sofya,
I tried making this yogurt a few times but I must be missing something. I tried Greek-style yogurt (Fage) at 2%. Could that be an issue? Also, how important is temperature? I added the yogurt when the temp was 108 degrees and after I took it out of the oven in the morning, it was still milk. (Once I added it when it was still 180, so I know that’s definitely an issue and I should read directions better.) Also, in one of the comments above, I see that you’re listing 1T of yogurt and not 2 as in your recipe. Am I using the wrong yogurt to start with, or is the temp really that big of a thing to stick to, or is it something else?
Thanks for your help in troubleshooting yogurt (LOL!)
Anna
The temperature is clearly an issue. Temperature is everything for yogurt – it has to be 110 to 113 when you add the culture (more yogurt) – not 108, which is too cool. Definitely not 180! That will kill the culture dead. It doesn’t matter if it’s 1 or two 2 T of yogurt, but note that I make 2 quarts (1/2 gallon) at a time. I believe that 2% milk is fine for this purpose, and whichever yogurt you are trying should be fine too.
Also, did you use a crock-pot or just some other pot? Crock-pot keeps the temp really steady because the inset is ceramic and retains the heat well. But it doesn’t have to be – you can also use a thermos. But I wouldn’t use just any pot, myself. I tried this twice with just a stainless steel pot – once with a whole gallon, once with a half-gallon. It worked with the whole gallon (cause there was more milk to keep the heat up), but not with a half gallon.
So, let’s reprise:
Either
1) Heat your milk to 180 degrees to kill any other cultures that might be present in the milk. Let it cool to 110-113 degrees – it is extremely important to remember those numbers. Remove 1 C of milk, and stir 1 (or 2) T of yogurt into it. Whisk it in really well. Now pour the milk/yogurt mixture back into the rest of the milk. Again, stir it in very thoroughly. Stick it in the oven overnight with the light on.
2)Heat the milk to 180. Let cool to 117. Add TWO T of cold (out of the fridge) yogurt directly into the milk. Stir it in well. This will bring the temp down somewhere to that magical 110-113 window. Stick it in the oven overnight with the light on.
If it fails, just heat it again until the curd separates from the whey (not quite to the boiling point), then let it drip for a few hours through a flour-sack kitchen towel (like I did in the pictures above), and make ricotta, or add salt, making it into “shor,” Azeri salty ricotta-like spreadable cheese. That is also good if you add some nigella seed to it.
Good luck!
Thanks! I will give it a try. I generally use whole milk with a crock pot. The first time I made it, it came out very loose, but more like a yogurt than milk. I suppose I could have strained it and gotten ricotta, but I can’t imagine using essentially a half gallon of ricotta. I’m definitely in this to “win”, and it’s one of my food goals for the year.
Thanks again,
Anna
I think your only pitfall was the temperature. Also note that I remove the skin/film (the “penka” stuff that everyone always hated) and discard it – if stirred in, it 1)affects the texture – makes a greasy film float on the top 2)creates unpleasant lumps in the yogurt, so you don’t get a smooth product you are after. Note that I use non-homogenized milk, but I think that same thing happens with homogenized milk as well. Note that you can’t strain it and get ricotta without heating it to separate the curd from the whey first.
Sofya, thanks for the recipe and the encouragement, I started making yogurt regularly since you posted the “tutorial”. I make it in a stainless steel pot and get fabulous results, for half a gallon as well as for quarter of gallon, and with whole milk for the kids as well as with skim (1%) milk. I don’t have a slow cooker, so I heat the milk on the stove and leave it in the oven for the fermentation.
I also heat milk in microwave oven in a glassware when at my workplace (they are used to my making-from-scratch attitude towards food and often benefit from it), and then leave it to ferment on my warm computer wrapped loosely in some cloth (see what happens when they let woman to a computer 🙂 ).
At first, I tried to play with temperature for few times, and it led me to making ricotta, which is wonderful from whole milk, and still good from 1% milk.
[to Anna: it makes far less ricotta than half a gallon, since you drain the whey out, which is the most of your volume.]
At my workplace I don’t use a thermometer, but feeling by touch (from my experience from home) and it haven’t let me down so far, so the temp. range must be wider than 111-113F.
Anyway, I and my whole family say THANK YOU to you .
Ilana.
A few other people report doing it on their counter in jars and such. Especially if you have a space with a steady temperature. Notice that my house is 55 degrees or so by morning since we only heat with wood or some days not at all this time of the year (pretty cold on summer mornings even) – so heat retaining of the vessel itself is very important to me. I also kind of think the important part is not that the temp stays at 110-113, but that it starts out there, I think. Also, the actual range is 110-120, but mine gets runnier when I get to 120, with the thickest yogurt turning out at 110-111.
I have no doubt that 1% milk works – I now skim my milk (remove most cream to make butter), and then skim off the film that floats to the top, so I am sure mine gets pretty low fat this way too. (Note that I am not generally for low-fat things, but I like using some of my own cream and butter).
Hi Sofya,
I found your blog recently because it got profiled in the Chicago Reader. I finally tried the crock pot yogurt and it turned out great! The venison with blue cheese is next on my list 🙂
btw, my grandma lived in Viroqua and I have lots of relatives in the area – I love visiting them and getting out of the city from time to time…
Happy birthday!
Stephanie
I am glad you found it! Good luck with the difficult home vs. hospital decision when you are ready to make it.
Sofya, what is the brand of your digital thermometer? Where did you purchase it? Have you had good luck with it?
I bought the whatever generic stuff they had at Walmart, so I think that brand is called “mainstays” or something like that. It works incredibly well for about 2.5 years then you need to replace it. Because I use them, at times, several times a week (for different things), I really don’t mind replacing it for a little over $10. It has a timer that goes off when your stuff reaches the right temp, which I love. I use it for meat, candy, and yogurt a lot. I am on my second one, I’ve been using them for a long time.
Thank you!
Anytime.
I am sure its too late for this time but I currently have 2 qts of whole milk in my crock pot to make my first batch of yogurt and one point confuses me!
In your instruction you say 2 tablespoons of live yogurt and in the web site you say you used originally she says 1/2 cup yogurt.
Is yours a typo? It seems like its not since your final product appears thicker then the other site you referenced.
Maybe you have the magic amount for thicker yogurt?
In the end I will try twice of course, or 10 times but I am not sure which to try tonight!
If you could let me know for next time that would be great!
Hi Stacy – I didn’t say I followed the other site exactly – so it’s not a typo. You don’t need a whole 1/2 cups – in fact, your yogurt will be thicker if you do less rather than more because yogurt culture needs space to culture the milk properly – if you put too much culture into milk (by adding too much starter, i.e. other yogurt), it’s likely to be thinner, not thicker, because it will just be too crowded in there for proper “colonization” of the milk by the culture. Even 1 T would be enough. Does this makes sense? I got this info from the Joy of Cooking.
It does make sense, was just confirming. Thank you so much for getting back to me so soon. Still have time to add only the two tablespoons tonight.
Thank you very much!
Glad I could be of help.
Alright!
It did work for sure. I am just not sure of the final product is as good as it should have been?
Nothing rose to the top to be skimmed off when it was cooled.
The actual yogurt this morning it seems like half of it is thick-ish and half is kinda thin and loose.
So it is
A)Not all done, maybe i need longer then 10 hours?
B)Messed up the temperature at some step?
C) Something went wrong with the heating to 180 and cooling to 110?
D) Just needs to be refrigerated to see the final product.
I have a suspicion my thermometer is dying. Last time I used it I wondered if it was wrong given the final product of my meat. I will buy a new one and try again.
Oh and other issues is we have central air, my house is cooler. It was in the oven and the crock covered in towels. I just wonder if the temp was too low to all set properly. I did the heat to 180 and cool to 110 before adding yogurt part.
Do you cool all the yogurt in the crock pot in the fridge to let it set properly and then put into container for storage or containers from the start? Maybe it would have set more and some whey rise if it cooled in the crock in the fridge?
I am sure it worked some what, just wondering what to adjust for next batch!
It still is a success though!
Hey there Stacy – I think your main problem was the temp.
Here’s my reply to some of your points:
Nothing rose to the top to be skimmed off when it was cooled.
That’s probably because you are using store-bought homogenized milk – nothing wrong with that, but I only use non-homogenized milk, so my experience might be different. That’s no big deal.
The actual yogurt this morning it seems like half of it is thick-ish and half is kinda thin and loose.
It is normal for the yogurt on the bottom to be thinner than at the top – I don’t know why – but this is not a store-bought product, and it’s not thickened artificially, so it doesn’t have the same uniformity. Also, you know that yogurt is curd and whey? The curd is the yogurt stuff, and the whey is the yellow watery stuff that was formerly the water in the milk? The whey will always seep out in the yogurt that’s not been artificially thickened.
A)Not all done, maybe i need longer then 10 hours?
10 hours is definitely enough.
B)Messed up the temperature at some step?
That, and/or your yogurt was too cold when it was incubating.
Continued…
C) Something went wrong with the heating to 180 and cooling to 110?
What could go wrong there?
D) Just needs to be refrigerated to see the final product.
It is true that yogurt gets thicker in the fridge as it sits.
I have a suspicion my thermometer is dying. Last time I used it I wondered if it was wrong given the final product of my meat. I will buy a new one and try again.
That’s probably it.
Oh and other issues is we have central air, my house is cooler. It was in the oven and the crock covered in towels. I just wonder if the temp was too low to all set properly. I did the heat to 180 and cool to 110 before adding yogurt part.
Towels don’t really work for me as an insulator – it is important for me to leave the light on in the oven to keep the heat up (electric light, NOT the pilot light, which I don’t have).
Do you cool all the yogurt in the crock pot in the fridge to let it set properly and then put into container for storage or containers from the start?
I put it into half-gallon jars (I make 1 1/2 gallons of yogurt at a time – sans crock-pot, at this point) right away, before sticking them in the fridge.
Maybe it would have set more and some whey rise if it cooled in the crock in the fridge?
No, this would make no difference.
I am sure it worked some what, just wondering what to adjust for next batch!
When you cooled your yogurt to 110, you didn’t put the cold yogurt culture directly in, did you? Did you remember to take some of the milk out (a cup or so), mix the culture in to warm it up, and then stir it back in? If you add it directly, you will bring the temp below where it sets properly. 111-110 is the magic number. Alternatively, cool your milk to 115-117 degrees, then add the cold yogurt in.
Also, this recipe is for a 2-quart crock-pot. I am not sure if larger crock-pots behave differently.
Alright, new thermometer and borrow neighbours smaller crock pot it is! I like experimentation anyways.
I am sure it was the heat somewhere. I did have the light on.
It did work, somewhat!
Next time will be ever better.
Yes I did mix with the cup of yogurt and back into the crock. Temp was exactly 110 when I put in the oven with the light on. I should have left it longer then 10 hours to see the result. Bet I wasn’t patient enough. It just seemed half set.
Is it necessary that scum does rise to be taken off? I had literally NONE. Just wonder if that meant in fact my thermometer is wrong and it never hit 180?
You are very patient. Thank you!
Would that be called scum? It’s the cream floating to the top. I see what you mean though. 180 is also when tiny bubbles form around the edges – you think did the bubbles form? That’s another way to tell.
Sometimes, when milk is not heated again like that (to 180, even after pasteurization – although some would say 165 is enough), stuff in the milk (whatever bacteria might have gotten in from the environment, as I understand) can interfere with the setting of the yogurt (interfere with the culture colonizing the milk).
Alright, more info to try.
I really dont think it heated properly to start off and I also think my crock pot is either too big!
Thanks so much!
Yes the scum. There wasnt a single bit of it. No separation at all. Couldnt tell cream from anything. Looked the same as when I put it in but did have a few bubbles kinda like scalded milk.
I will try again for sure. At least milk isnt too pricey.
We can use todays in smoothies anyways.
I haven’t had store milk in a long time, not sure how it behaves, if it separates or not. Mine is whole milk, too.
has anyone ever made yogurt with goats milk?
I haven’t…
Perfect recipe! I have only been making yogourt for about a month now, a total of four times so far, and I had success from the very first attempt. I really appreciate the emphasis on the correct temperatures. The first time I only used 1L of milk, but I’ve since used closer to 2L and had much better results (thicker, creamier).
Strangely enough, the third batch I made turned out…well, in the morning, all the yellow liquid seemed to have separated from the curd. I reheated and strained it out and did not have ricotta but ended up with a sort of labneh. I’m not sure why! It was delicious, though.
I am glad!
As to your 3rd batch, couldn’t you dump the whey (yellow liquid) out and then just eat the curd? That happens with a lot of my batches, that there’s a layer of whey on top in the morning – I just dump it. Yogurt with whey on top is not a failed yogurt. Yogurt’s curd is very unstable and whey always seeps out at some point (whey is water in the milk), in the fridge especially. You have two choices – either drain it somewhat or stir it back in. Much of storebotten yogurt often has pectin added to it to stabilize it and to prevent it from happening, which is not the case with homemade like this. But it’s possible that, with the seasons turning and your house probably getting colder, the yogurt separated so dramatically because of the colder general environment. Does this make sense?
I only tried ricotta with the failed yogurt that was like buttermilk (not set at all, still liquid), not the yogurt that turned out, like yours. I am not surprised that it didn’t lead to ricotta, because ricotta is made from milk with the addition of acid (in this case, yogurt bacteria, which is acid-producing), not from yogurt.
I see where my mistake was, then, I saw that the liquid had separated right out and thought it hadn’t set. The result was still tasty, though! Thanks for your response!
And in general yogurt-making is a good remedy against perfectionism, because, just as you see, most batches will be perfect, and every once in a while you get an imperfect one, and that’s just fine! It still tastes good, especially when used for cooking. The only issue is when it remains pretty much buttermilkish milk, and that’s when you make ricotta, but that only happened to me maybe 3-4 times in well over a year of making yogurt weekly.
I just tried your method (1 gallon skim milk in a 6 qt crockpot). It worked! My only mistake was taking it out of the oven after 7 hours (my timing didn’t allow for leaving it over night). It solidified, but could use a bit more tang.
I drained through cheese cloth it for an hour and now have a bit more that a 1/2 gallon of very thick Greek yogurt. I saved a ton of money! Yippee!
Jaye – you did everything right. Tang actually develops in the fridge. Fresh yogurt like that is always mild. Try it in another half a day and see for yourself.